Project Management
Create a New Project
When hovering the mouse over the current project name and clicking "New Project", the software will automatically save the current project, then create and open a new project. The new project will have a default name, which can be modified manually.
Edit Project Name
![]()
Click on the "![]() " icon after the project name, and the project name will enter the editing state. After modifying the name, press the Enter key or click on the blank area to make it take effect.
" icon after the project name, and the project name will enter the editing state. After modifying the name, press the Enter key or click on the blank area to make it take effect.
Open Project
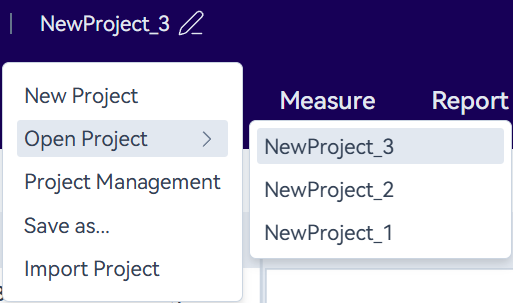
Move the mouse over the name of the current project. Then, select the project you want to open from the project list after "Open Project" and click on it to enter the corresponding project. The projects here are those stored in the local database and do not include the projects saved separately in file format.
Manage Projects
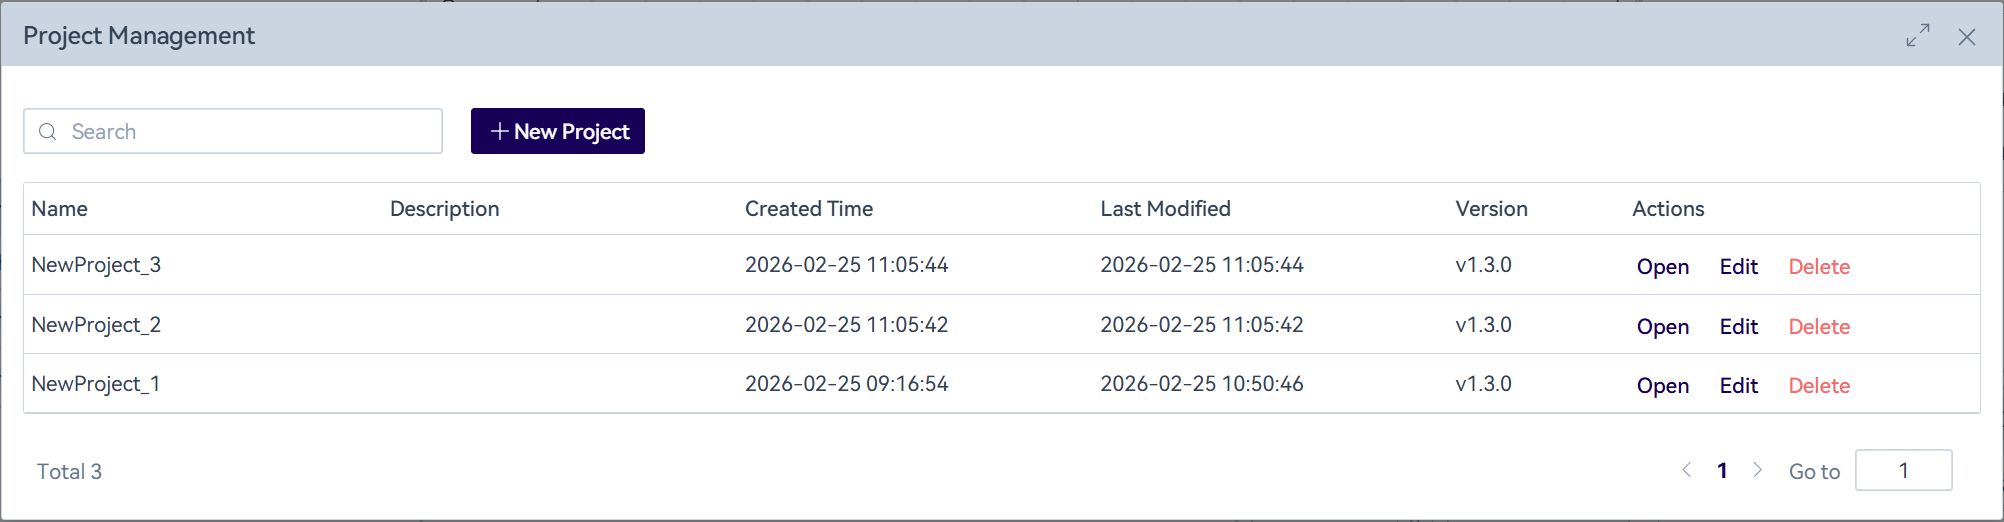
Move the mouse over the name of the current project, and then click on "Manage Projects". In the pop-up window, you can perform operations such as adding, deleting and modifying projects.
In the project management list, you can view the software version used when a project was created. In most cases, OpenTest is backward compatible with earlier versions. However, if major changes make a project incompatible, the version number can be used to pinpoint the issue and facilitate communication to resolve it when the historical project must be used.
Import & Export
Supports exporting/importing projects as files for easy copying and transfer. Hover over the name of the current project and click "Save as...". After selecting a path, an .ot project file will be generated. Click "Import Project" to choose an .ot project file on your computer to import. After import, a project with the same name will be created in the local database. Any operations on the imported project will not affect the original local file. To update the file, export the project again and overwrite the original file. Note: Projects created before v1.0 cannot be imported.