Channel Setup
Choose Channel
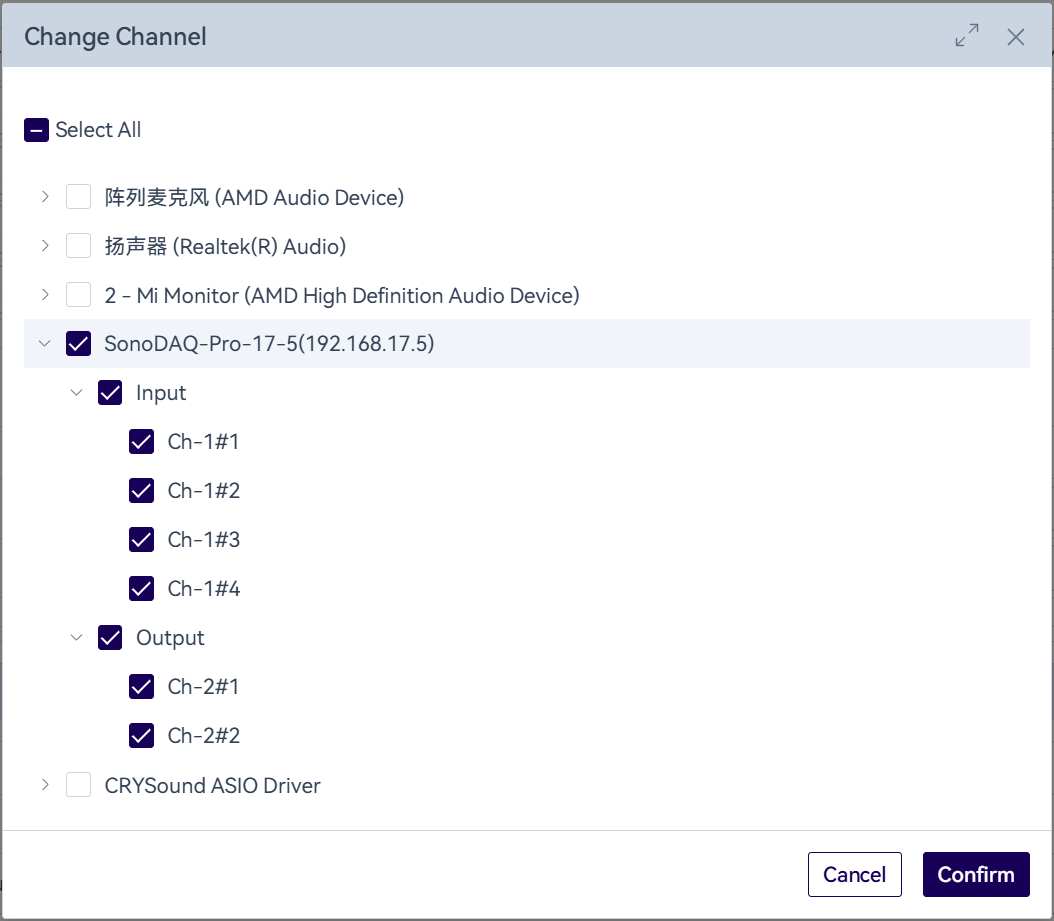
In the hardware configuration dialog, click the "![]() " icon on the right side of the channel list. In the pop-up window, select the channels you want to use in the project, then click "OK". The selected channels will be updated in the channel list.
" icon on the right side of the channel list. In the pop-up window, select the channels you want to use in the project, then click "OK". The selected channels will be updated in the channel list.
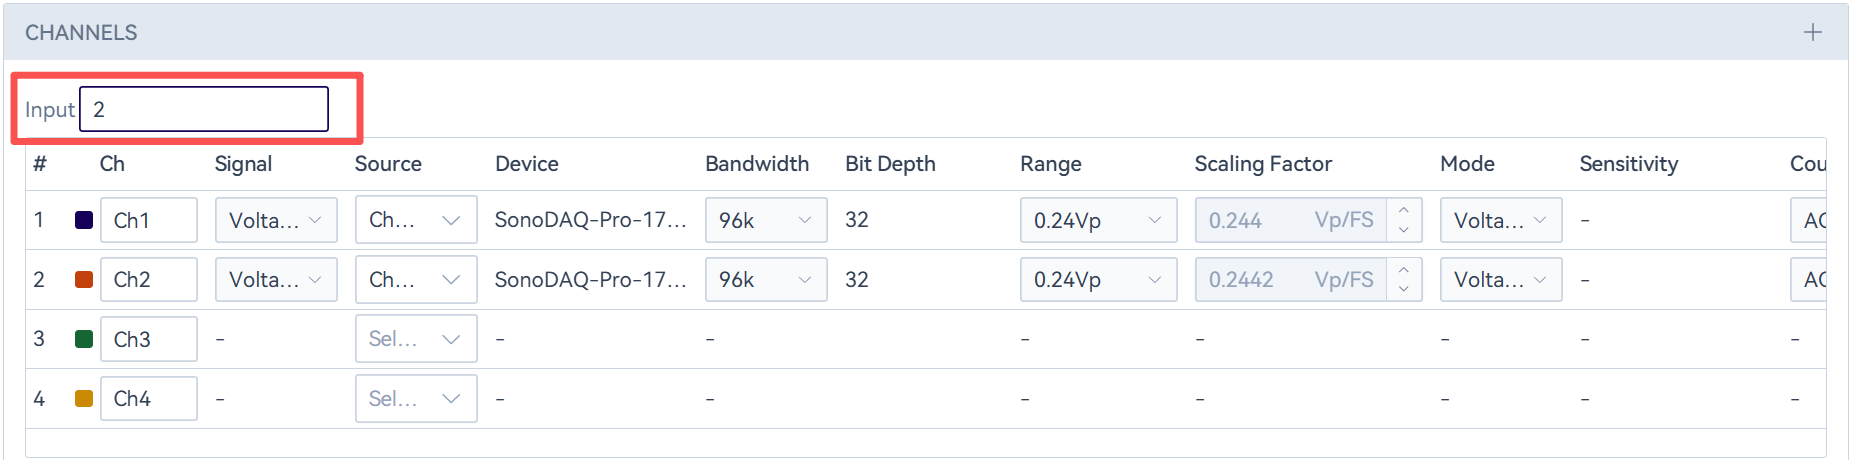
When the number of selected device channels exceeds the number of virtual channels configured in the project, the system will automatically increase the virtual channel count based on the selected channels. When the number of selected device channels is less than the number of virtual channels configured in the project, the extra virtual channels will have no physical channel assigned, so that devices can be replaced within the project. If you need to remove redundant virtual channels, you can delete them by changing the number after Input Channels or Output Channels.
Modify Channel Parameter

In the settings panel, only Signal Type, Bandwidth, and Range can be modified. For additional parameter settings, please use the hardware configuration dialog. Changes to channel configuration take effect in real time, and available parameters vary dynamically by device type, including but not limited to Range, Bandwidth, Vp/FS, Signal Type, IEPE switch, Sensitivity, Coupling mode, etc.
Batch Set/Read Configuration
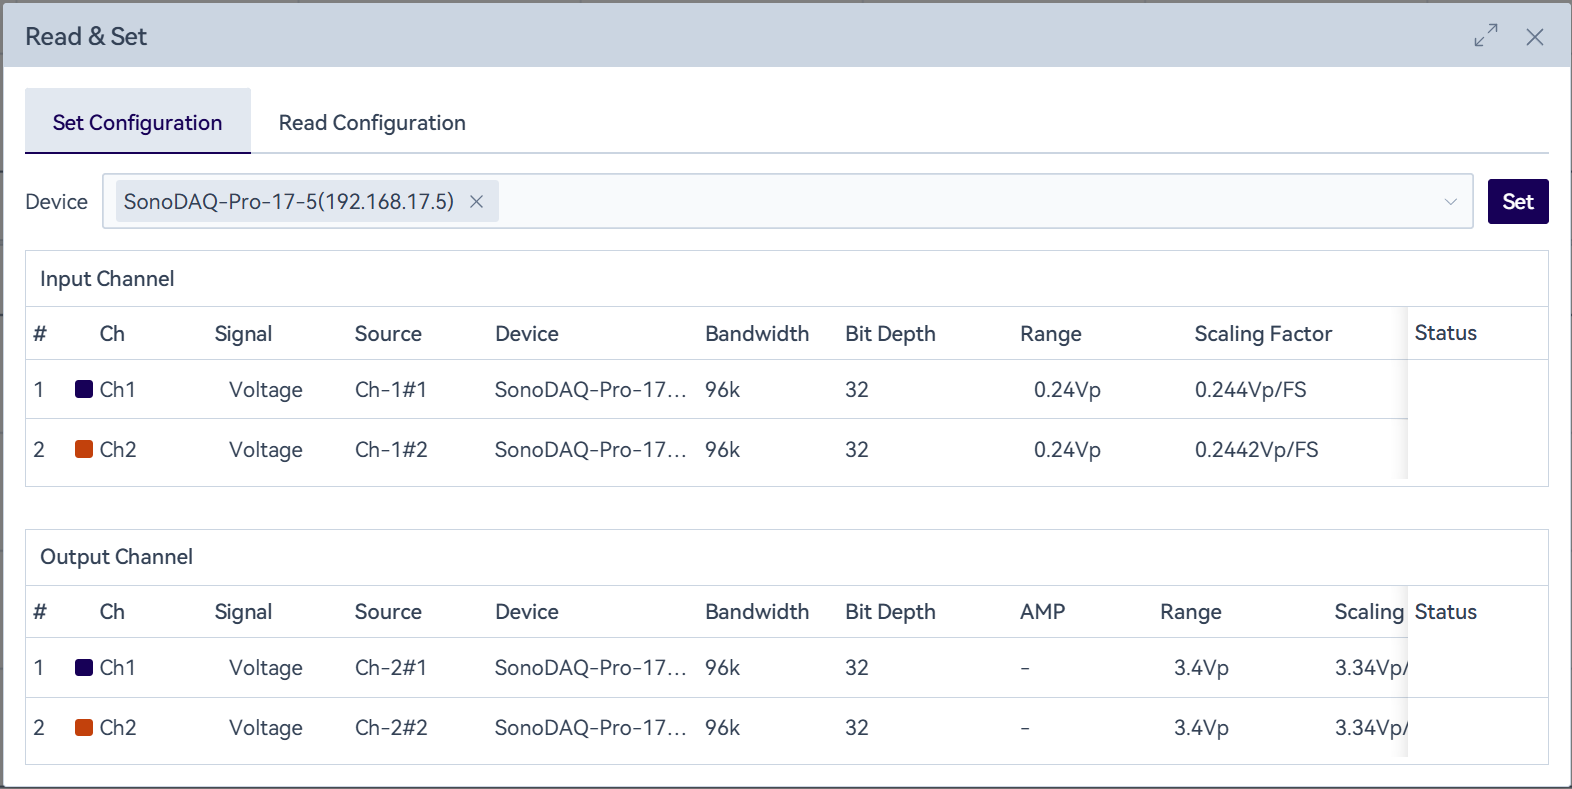
After switching projects, the system will batch-send the channel parameters saved in the project to the device.
When starting a test, the system checks whether the channel settings in the project are consistent with those on the device. If inconsistencies are found, you can choose to batch-send the settings or read the device-side parameters. Select a device and click the "Send/Read" button to batch-apply the project's channel parameters to the device, or batch-read the latest configuration data from the device.