Hardware Setup
Supported Devices
OpenTest supports DAQ devices via multiple protocols including openDAQ, ASIO, WASAPI, MME, Core Audio, and NI DAQmx. Verified compatible hardware include:
- SonoDAQ
- CRY6151B
- CRY2708、CRY2716
- Dewesoft-XHS
- NI-USB-4431
- Echo AIO Test System
- Built-in sound cards (WASAPI-compatible)
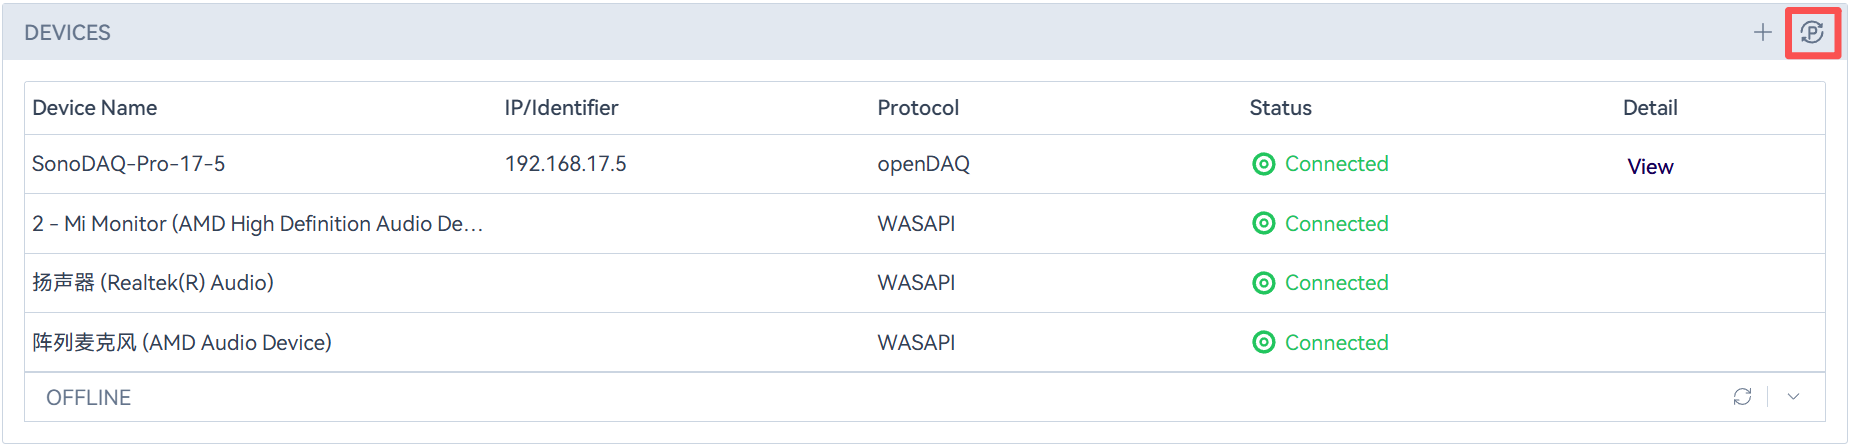
Scan Connected Devices
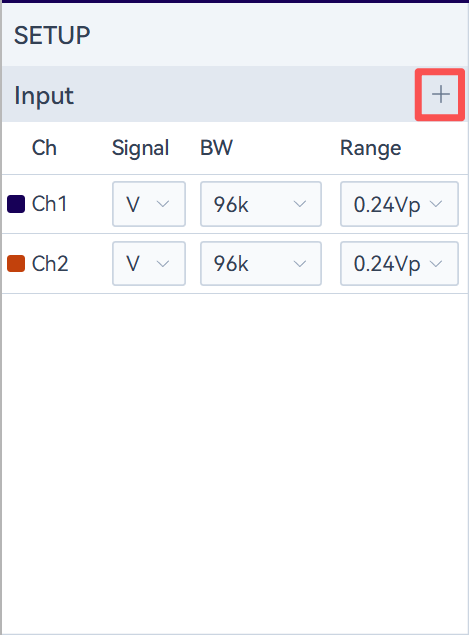
Click the “![]() ” icon in the upper-right corner of the settings bar. The software will automatically scan the devices currently connected (currently supports access via openDAQ, WASAPI, ASIO, and NI DAQmx drivers). After the scan, a pop-up window will show newly connected devices and disconnected devices. Click the “
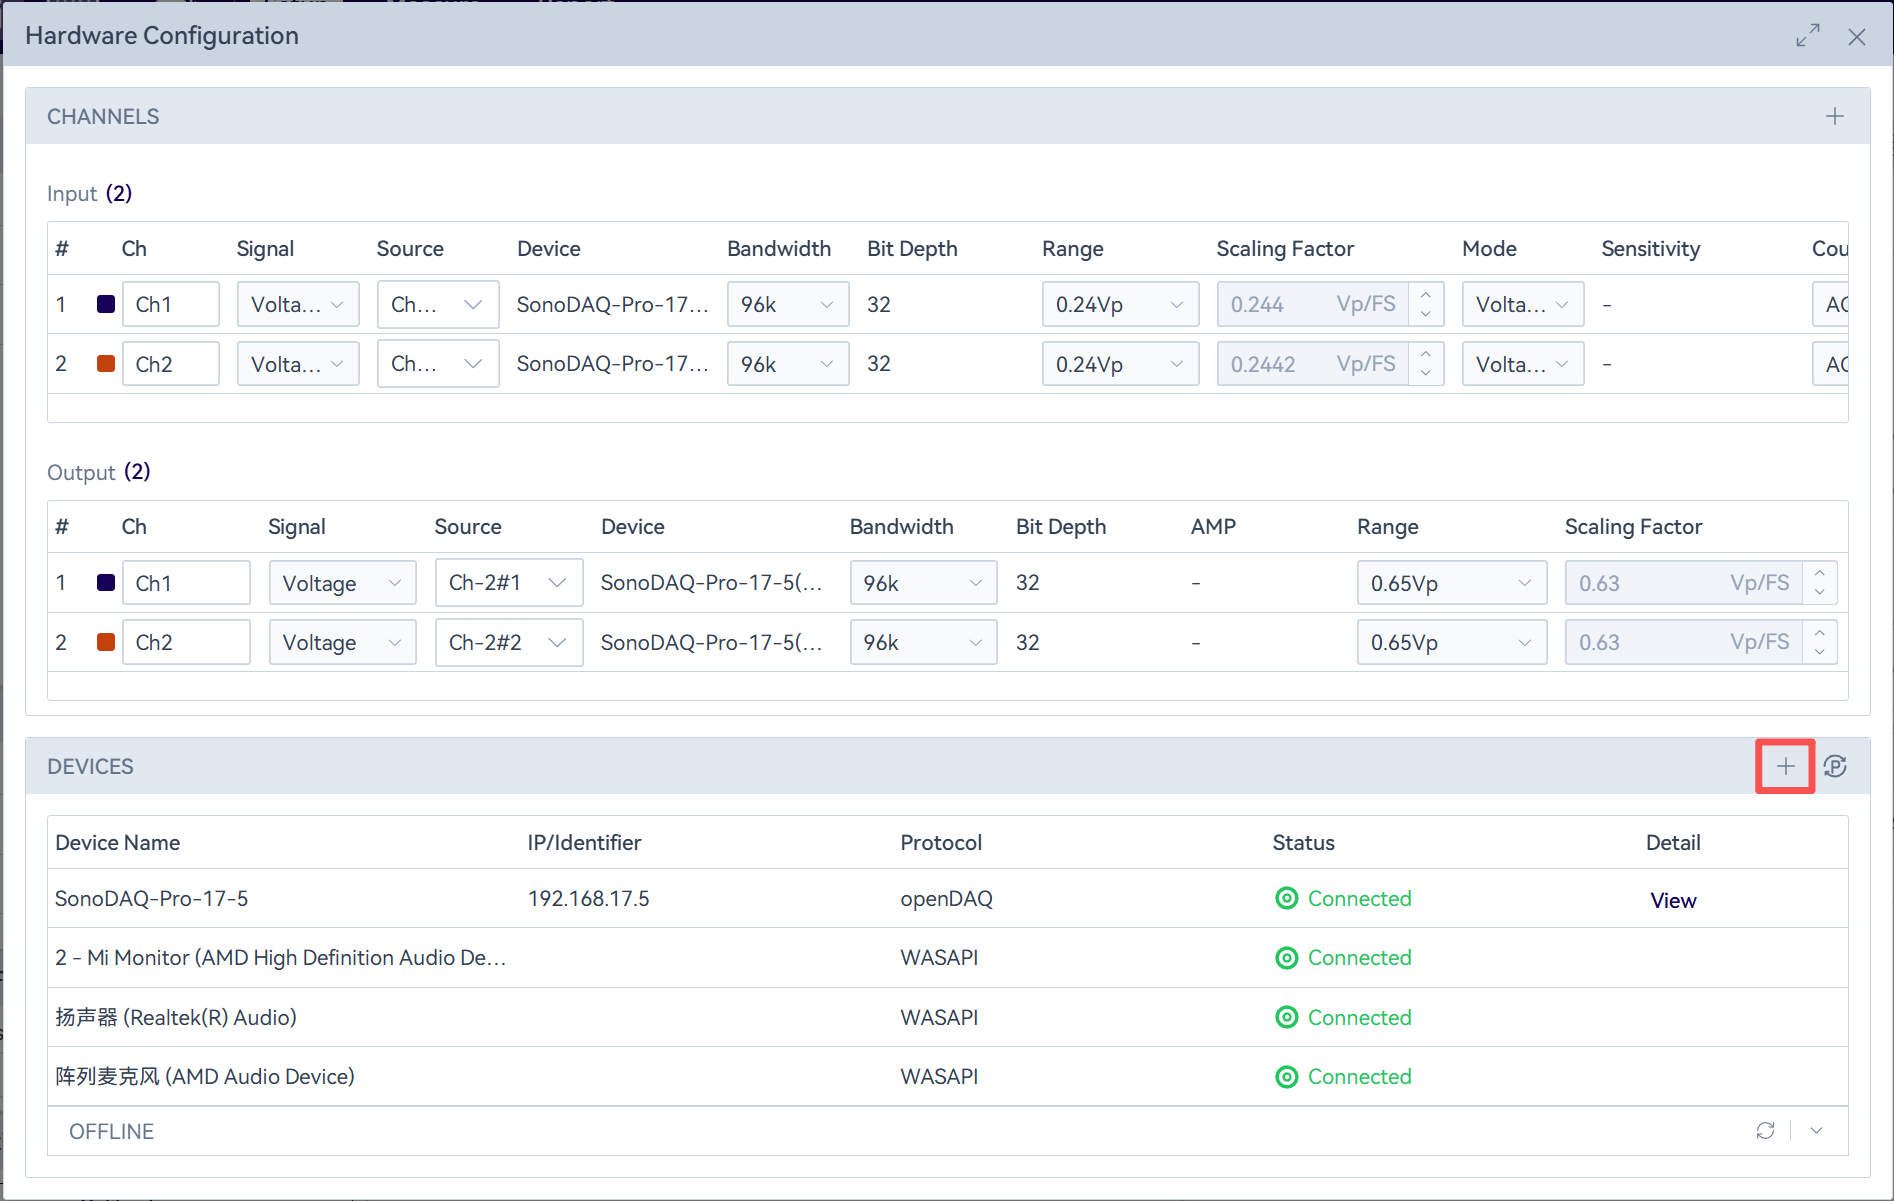
” icon in the upper-right corner of the settings bar. The software will automatically scan the devices currently connected (currently supports access via openDAQ, WASAPI, ASIO, and NI DAQmx drivers). After the scan, a pop-up window will show newly connected devices and disconnected devices. Click the “![]() ” icon on the right side of the device list to manually trigger a scan or manually add a device connected over the network.
” icon on the right side of the device list to manually trigger a scan or manually add a device connected over the network.
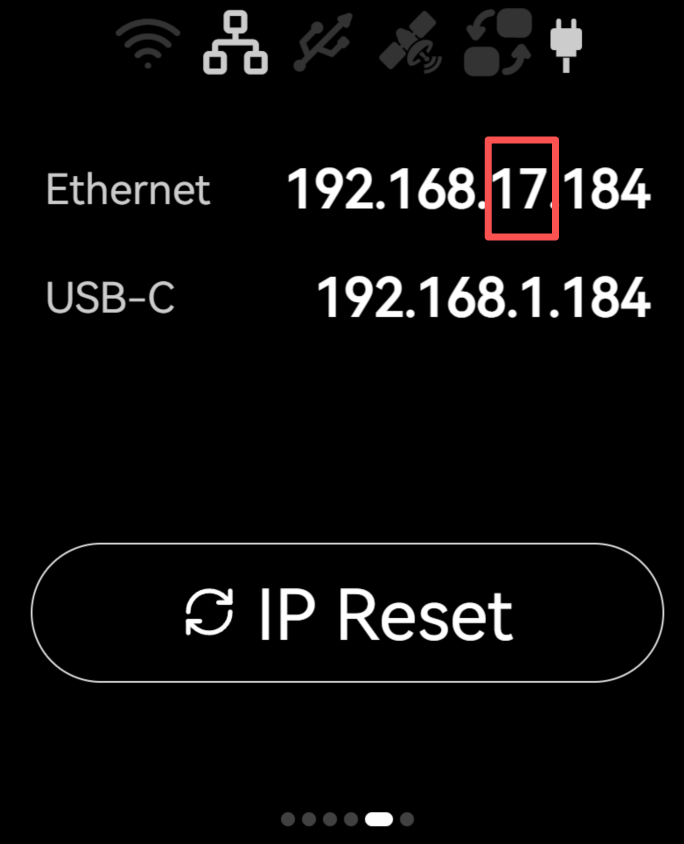
Notes: When using the scan function to discover devices, you need to ensure that the network-connected device and the PC are on the same subnet.
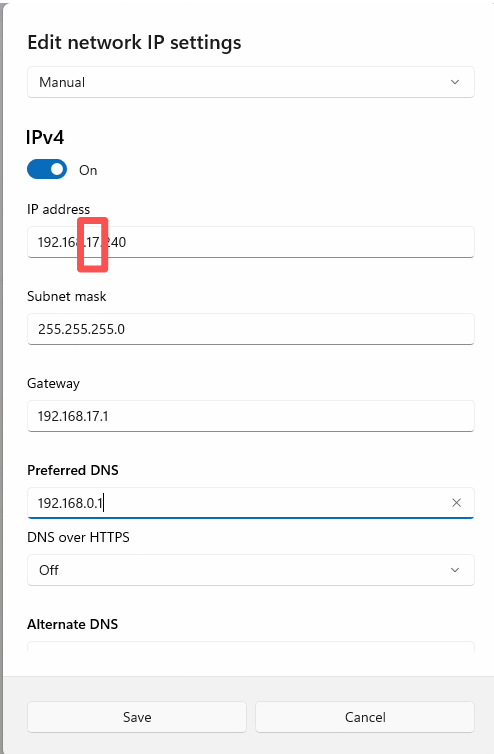
Configure the PC as follows:
- Open the Ethernet settings.
- Change the IP address so that it is in the same subnet as the device.
Manually Add Network Devices
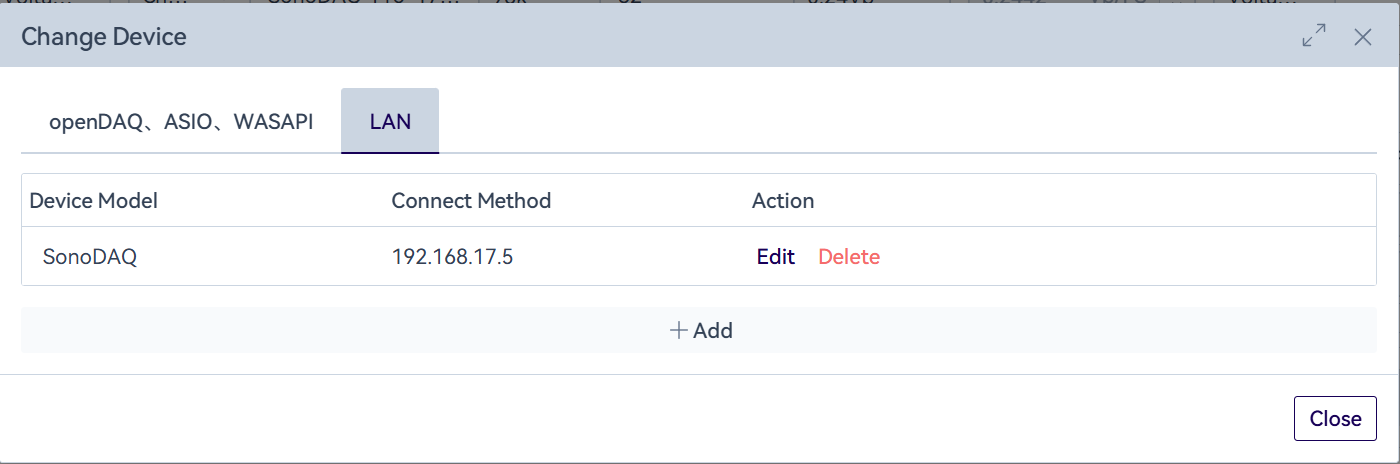
In the hardware configuration pop-up, click the “![]() ” icon on the right side of the device list. The dialog will switch to the “LAN” tab, where you can add, delete, or edit network-connected devices (currently only CRY2708 and CRY2716 are supported). Note: When adding or editing a device, make sure the device is online; otherwise the operation will fail.
” icon on the right side of the device list. The dialog will switch to the “LAN” tab, where you can add, delete, or edit network-connected devices (currently only CRY2708 and CRY2716 are supported). Note: When adding or editing a device, make sure the device is online; otherwise the operation will fail.
Refresh to Get the Device Status
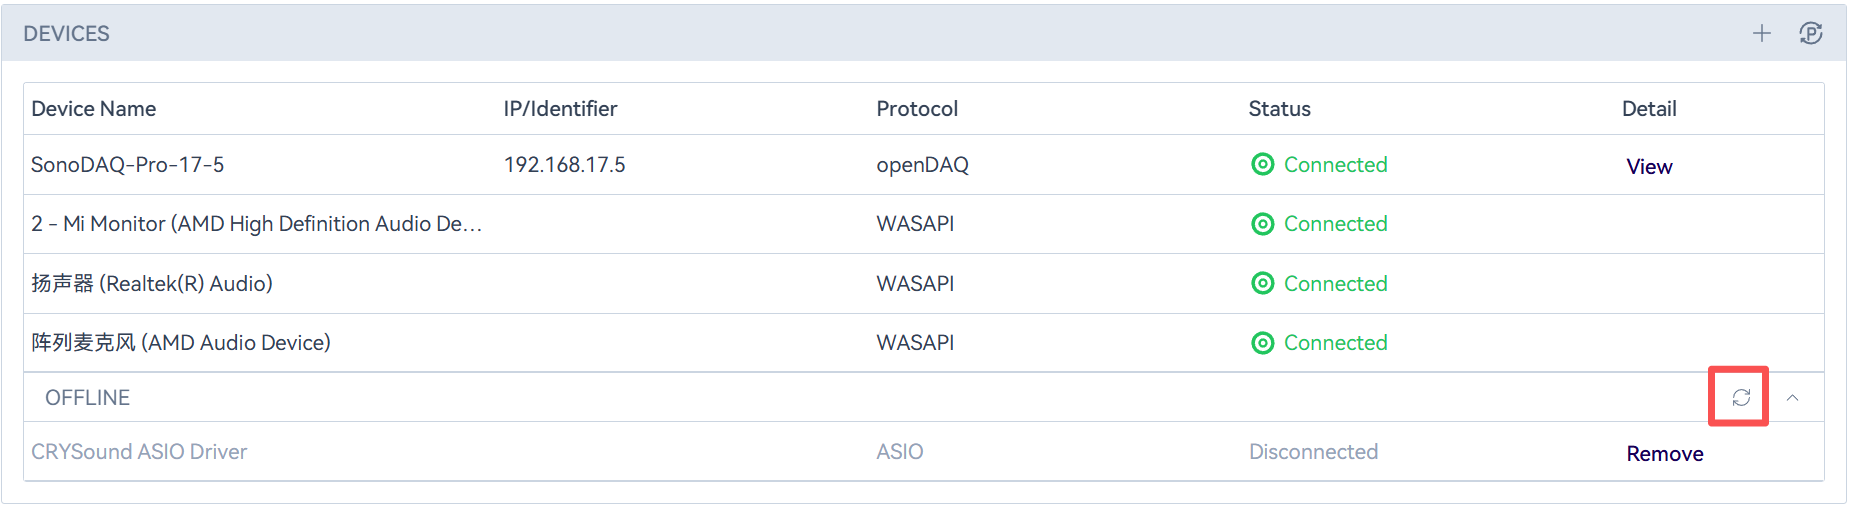
In the hardware configuration dialog, the system refreshes device status every minute.
To trigger it manually, click the “![]() ” icon to the right of an offline device in the device list. This will immediately refresh the status of all devices in the list, reconnect network-connected devices that have gone offline, and update the SonoDAQ module information.
” icon to the right of an offline device in the device list. This will immediately refresh the status of all devices in the list, reconnect network-connected devices that have gone offline, and update the SonoDAQ module information.
SonoDAQ Setup & Information Inquiry
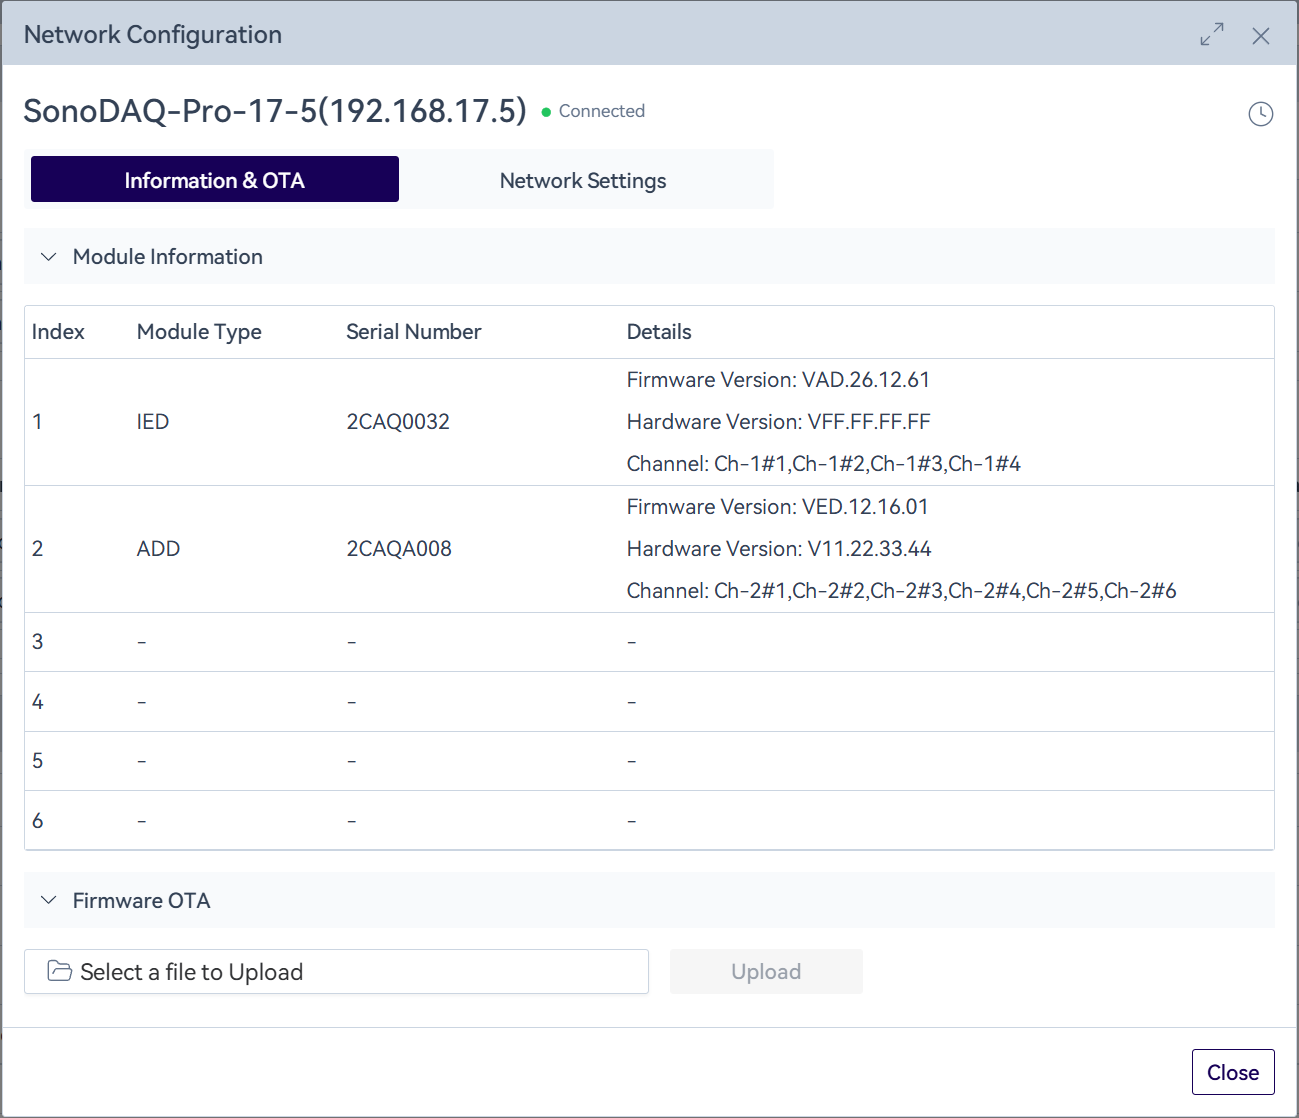
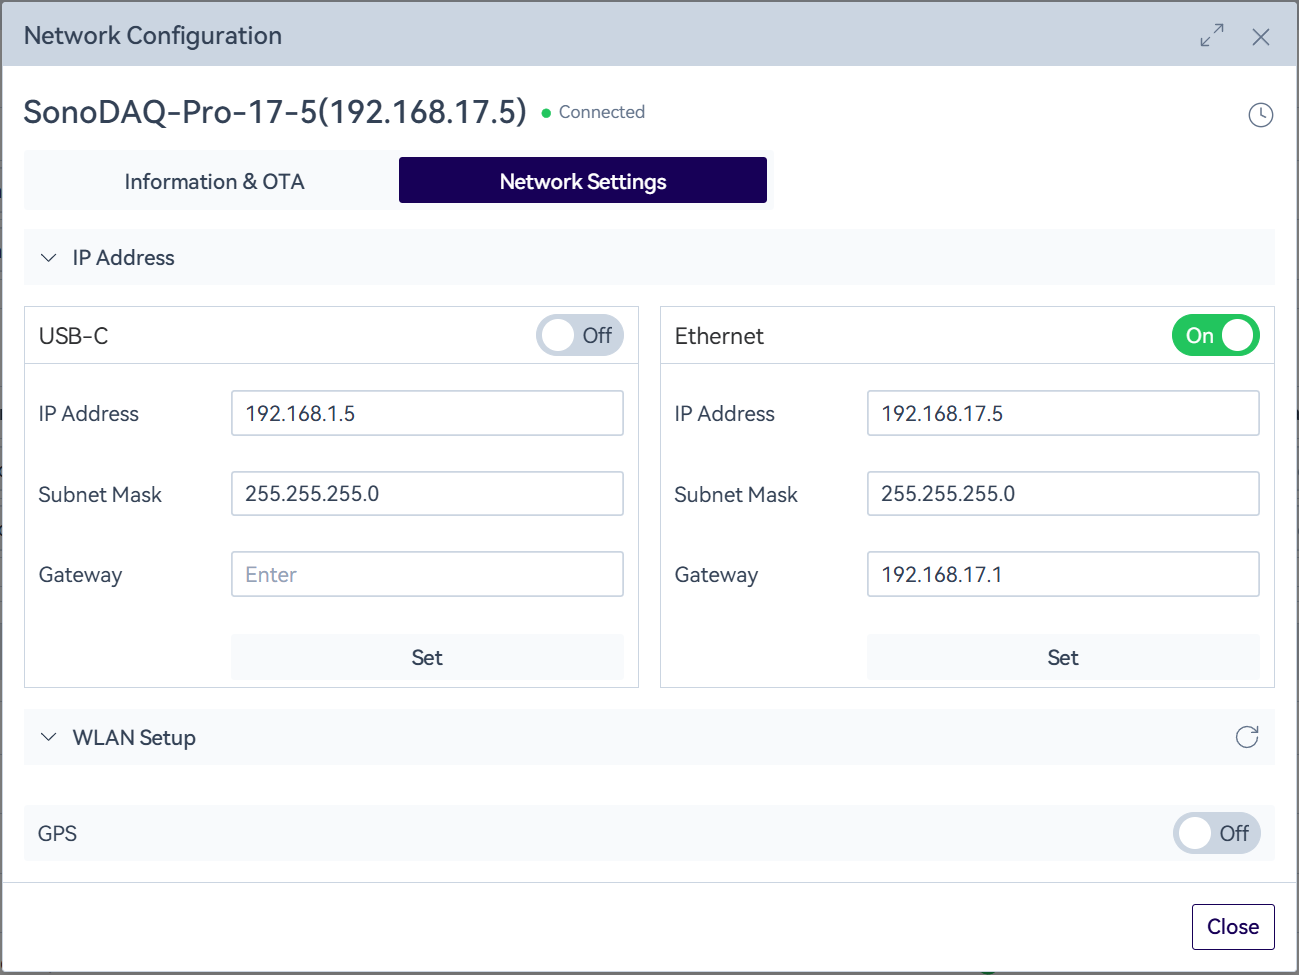
In the hardware configuration dialog, select an online SonoDAQ device in the device list and click View Details. When connected, you can configure the device network settings, turn GPS on/off, view module information, and perform firmware upgrades in the pop-up window.
For a firmware upgrade, first select a local file, then click “Upload” to transfer the file to the device. After the device verifies the file, you can proceed with the upgrade.
To use Wi-Fi, you must first enable Wi-Fi on the device’s small screen.
Clock Synchronization (PTP/GPS)
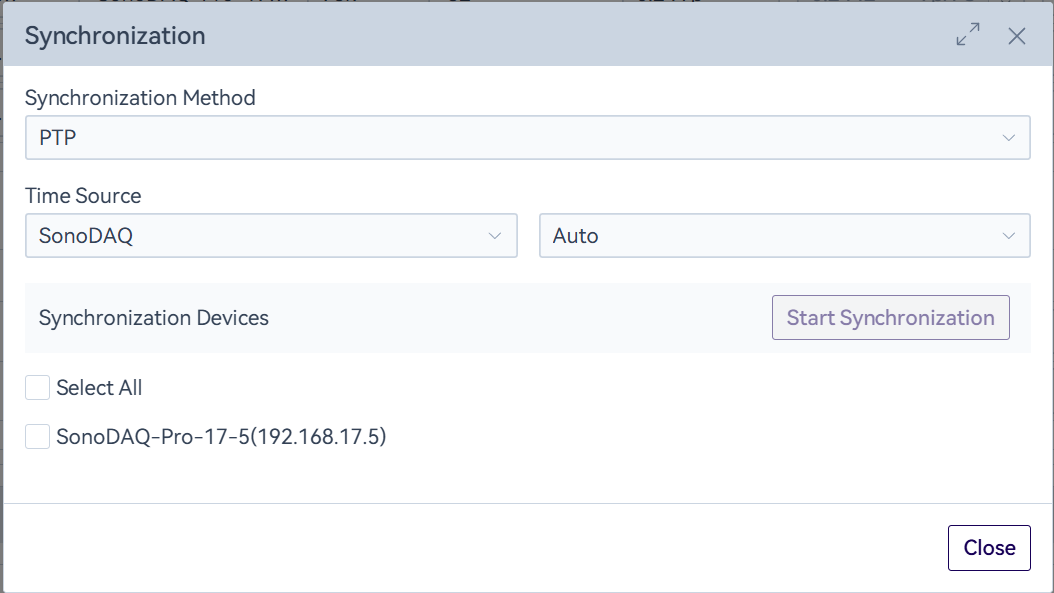
In the hardware configuration dialog, click the “![]() ” icon on the right side of the device list to open clock synchronization settings, including PTP synchronization and GPS synchronization. Currently, clock synchronization is supported only for SonoDAQ devices.
” icon on the right side of the device list to open clock synchronization settings, including PTP synchronization and GPS synchronization. Currently, clock synchronization is supported only for SonoDAQ devices.
PTP Synchronization:
After selecting the devices, click “Start Sync”. The system will send a command to enable the device-side PTP sync switch and display each device’s sync status in real time.
When the clock source is set to a specified device, the system sets that device as the master clock, and other devices synchronize their time based on it. When the clock source is set to auto mode, the system automatically elects one device as the master clock, which can be distinguished by the “![]() ” icon.
” icon.
Click “Stop Sync” to stop checking synchronization. Accordingly, data processing and plotting will be handled in unsynchronized mode, but the system will not actively send a command to disable the device-side PTP function.
GPS Synchronization:
After selecting the devices, click “Start Sync”. The system will send a command to enable the device-side GPS sync switch and display each device’s sync status in real time. Click “Stop Sync” to stop checking synchronization, but the system will not actively send a command to disable the GPS sync function.
Unsynchronized:
Based on the last synchronization method used, the system will send a command to the device to disable PTP or disable GPS synchronization (note: this does not turn off GPS itself).